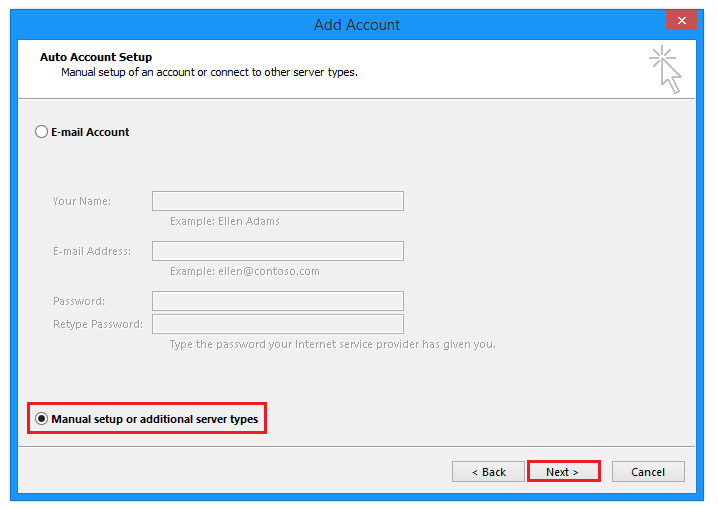
2. Select Manual setup or additional server types then click next
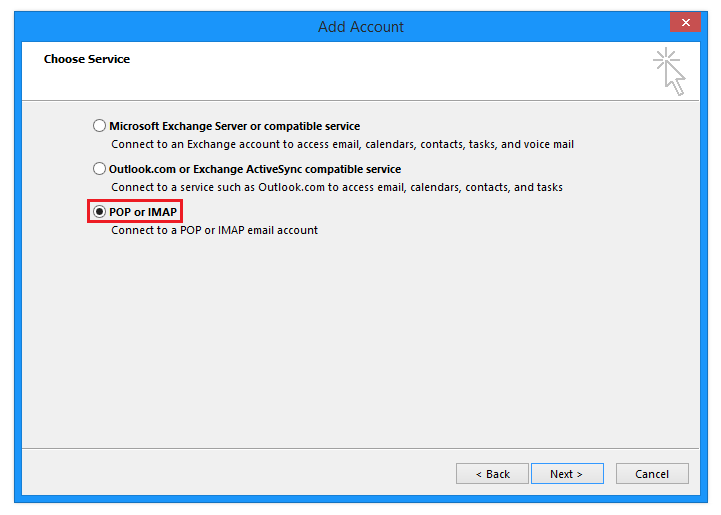
3. Select "POP or IMAP" then click Next
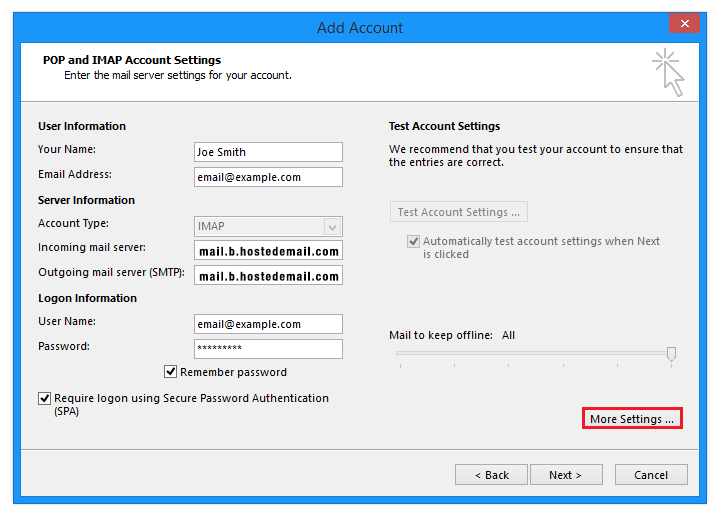
4. Complete the Add Account window using the email address, password and servers that were previously provided to you. Then click More Settings
5. From the Outgoing Server tab, verify that the settings are set to the below

6. Click OK to close the window
7. Once you are returned to the Add Account Screen, click Next.
8. Lastly, click Finish to exit setup.
